Nav aids like the VOR and ADF are there for you to use anytime you should need them. Having a solid understanding of these navigational (nav) aids is important and goes beyond training offered to us as private pilots, but is available for us to learn to become proficient aviators, particularly if we are regularly flying long distances, with passengers, at night, or any combination of those.
Basic nav instruments can be valuable
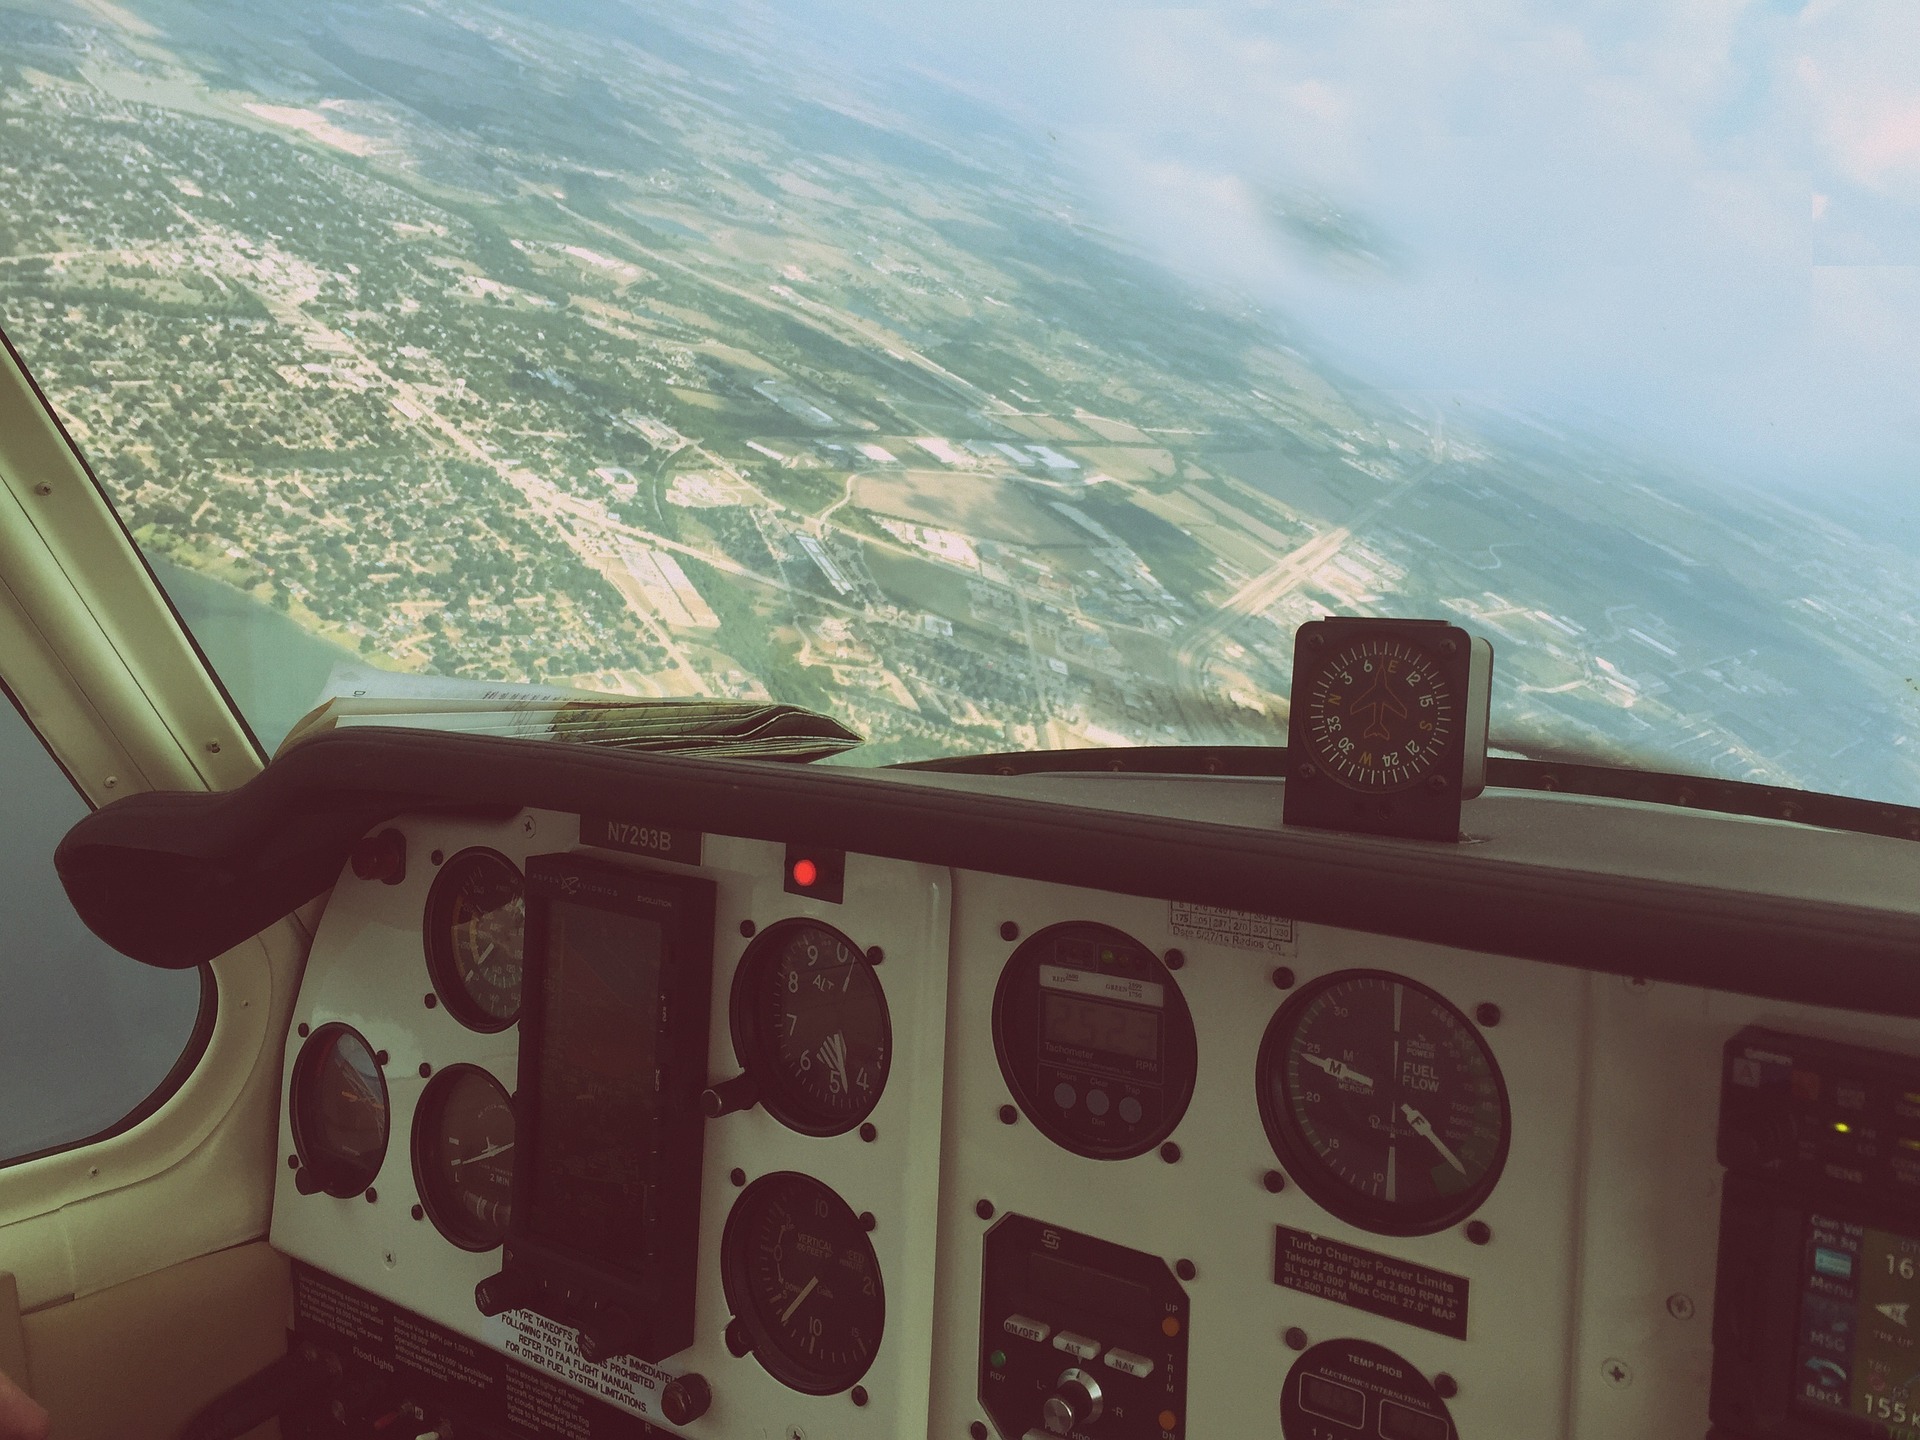
In a typical aircraft used for flight training, usually a Cessna 172, we’ll often have a VOR, ADF and GPS. When we’re training for our private license, we typically aren’t introduced to these tools, but we do learn about them briefly in ground school. In commercial training, we learn about all of these in more detail and must become proficient at them, as we’re expected to demonstrate their use on a flight test. But it should go beyond that. Even if you’re not training for a commercial license, you should be familiar with these nav aids and how to use them. In case the weather should deteriorate, particularly at night, you’ll be much safer.
These basic instruments can help you create a situational ‘mental map’ of your location, a mental map that will become invaluable should you get lost or encounter adverse weather and are forced to divert.
Preparing for a worst case scenario
Having the simple, yet valuable information provided by these basic instruments becomes extremely important in case the worst should happen. What if you take off with a shaky forecast, and fly into some weather? We’ve all been told that if we head into clouds or low visibility we should note our heading and begin a 180 degree turn into the reciprocal heading. But how about if we just loose visibility, flying into an area of low cloud or haze? We need somewhere to go, so how do we find it? We have to find a suitable place to divert to, and knowing where your ADF and VOR stations are on the map can help us get there.
A flight instructor gave me instructions for a simulator session to use as training in these instruments. The exercise has many practical applications for flying in both day and night, as it helps orient you in reference to a station and an airport, to help get you land when you need to terminate your flight due to deteriorating weather. It’s better to try to land at an airport than planning a landing in a field.
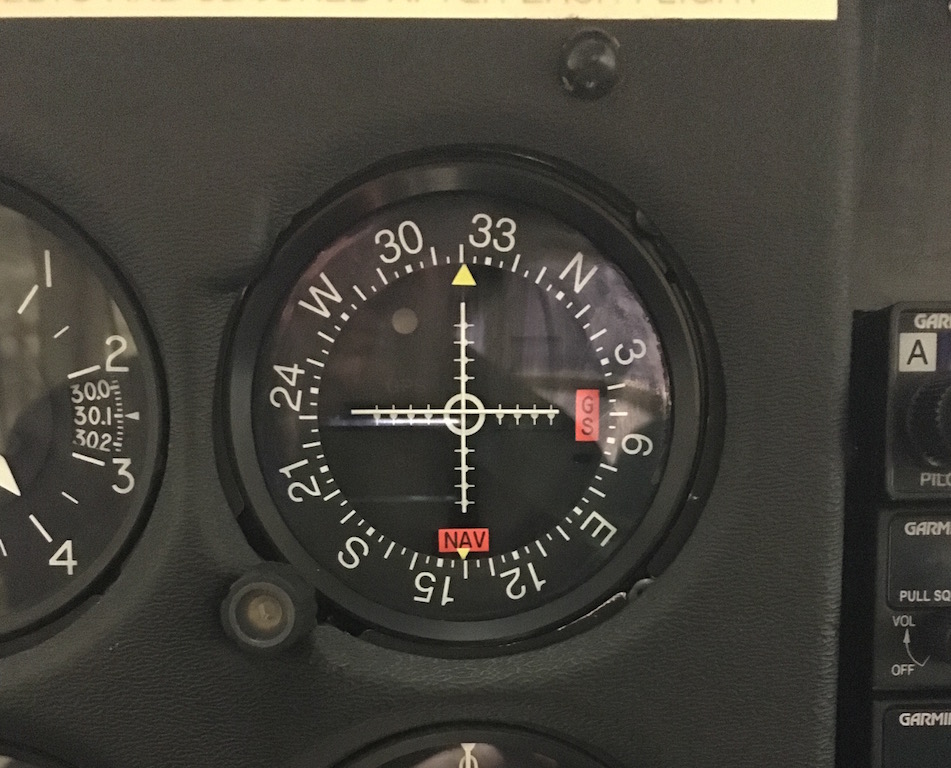
The VOR
The VOR transmits 360 single radials from a specific station. When you select a specific radial on your VOR instrument, you’ll be able to see which side of the VOR station you are depending if you see a “TO” or “FROM” flag. For example, say you are lost somewhere in the vicinity of Springbank airport in Alberta, and you want to return to there and land. You’re not sure which way you should head to get back to your airport. Knowing the frequency for the Springbank VOR, you tune it and immediately you’ll be able to get information of which side of the station you are on and how you should track to get back there.
Where am I?
Here is an example.
Once you tune your VOR to a station, select radial 150.
If it says TO, that means you’re on the other side of that radial. If it says FROM, you are on that side of the radial.
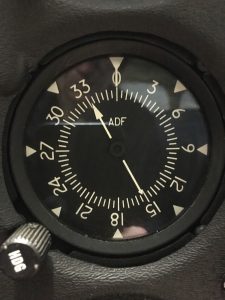
The ADF
Your automatic direction finder, or ADF is a basic instrument that transmits location information on the AM band. To use, tune it to a non-directional beacon (or NDB). The arrow on the ADF will always point to the station.
These stations will eventually be shut down in Canada, and Transport Canada has been planning to decommission the stations for years. This planned decommissioning is not happening quickly. They still remain, and will likely be around for years to come, and while they do, are a basic, though valuable navigational tool that you can use to orient yourself.
Where am I?
To use, once you tune the ADF to the specific NDB frequency, listen for the morse code. That is how you know you have the right NDB. Now, note where the arrow points.
The arrow always points to the station. To head directly to the station, align the nose of the airplane at the top of the instrument (0 degrees). To depart with the station directly behind you, align the arrow to point directly behind the airplane.
A real life example
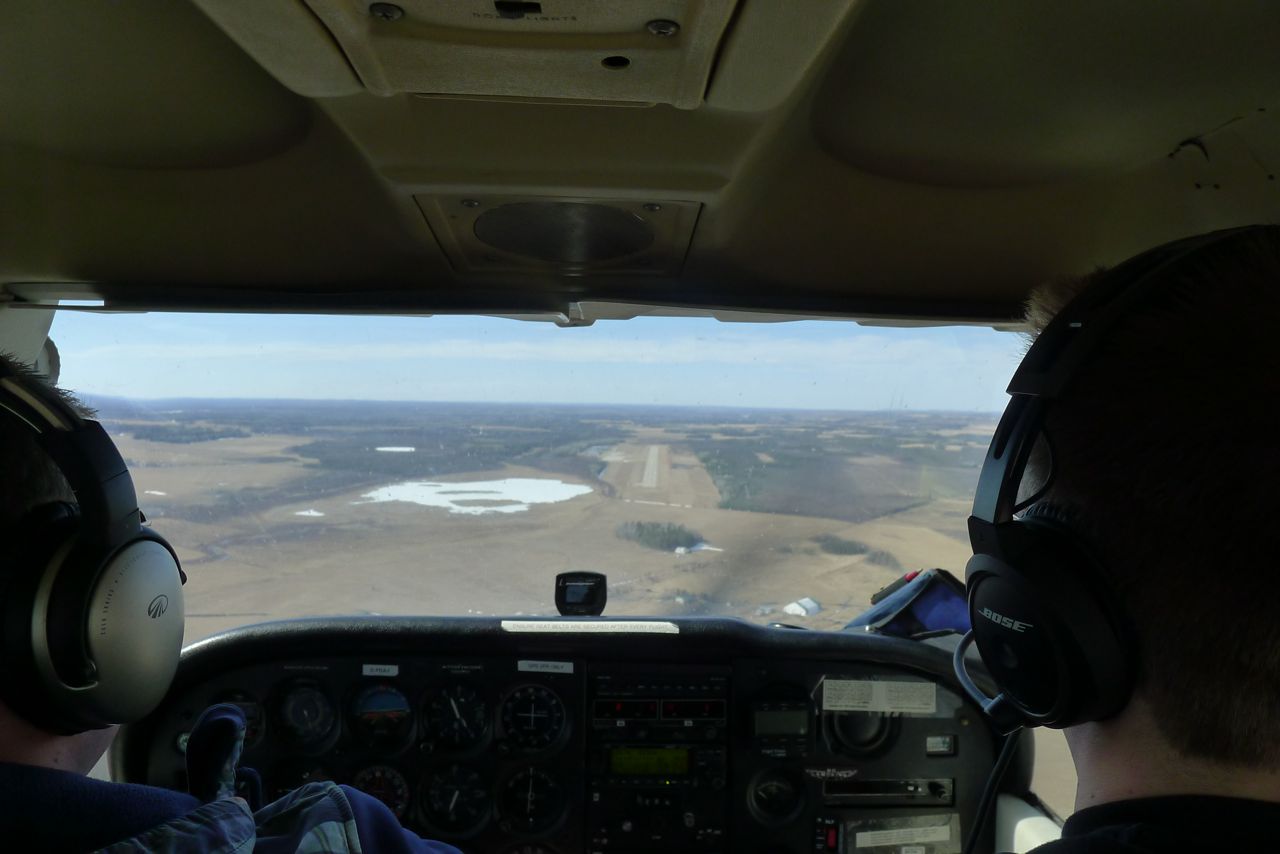
You depart Calgary/Springbank on a VFR flight with paying passengers heading north to Rocky Mountain House. The GFA shows a cold front moving through the area from the northwest with deteriorating ceilings and visibility over the next six hours.
On your way out to climb runway heading of 350 to 5500′, you intercept and track outbound of the Turner Valley NDB (299) and continue the climb to 6500′.
From Calgary International, you can track the V306 airway (116.7) to track outbound (away from) Calgary towards your destination. On your way along the track, you can tune to the Sundre NDB and to track your progress also and report when you’re abeam the station (when you are passing the station on your left hand side).
So, you know where you are and continue en route.
The ceiling drops. Now you have to descend to stay VFR. You descend to 4500′, taking note that there are towers in the area that are close to that altitude. Tune the Red Deer NDB (320), and use it to keep track of when you pass the James River, not abandoning the flight quite yet.
The weather gets worse – it now becomes unsafe to continue, and no longer VFR. Now you abandon your original course and aim for the closest airport – that is Red Deer. You’ve already got the NDB tuned to Red Deer, so you just turn and track direct to there, climbing back up to 5500′.
Enroute to Red Deer, you experience a vacuum failure. This means you’ve lost your heading indicator and attitude indicator, and you’re now flying partial panel, using your turn and bank coordinator as the best indicator of your attitude, cross referencing the airspeed and VSI to confirm.
You’ll cross the Red Deer NDB at your altitude of 5500′ and begin a descending, rate one, right turn to get to runway heading of 345 (the runway you’re aiming for will be runway 35). This is a timed turn, so you’ll have to note your heading going into the turn and make sure your turn is consistently rate one throughout. Or else you may over or undershoot your runway, and you don’t want to spend any more time flying around in precarious weather with limited instruments.
Once you land safely, there is great reason to celebrate. You have just used your skill to get your passengers, yourself, and your airplane down on the ground safely.